Placing & Finishing

Concrete should not be overworked and should be spread evenly and quickly once the pour begins. Make sure to overfill the forms slightly. If the pour is overworked, too much water will be floated to the surface, which can cause scaling after the concrete dries.
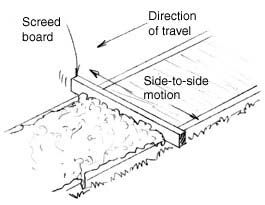
Once the concrete is spread well over the area and into all corners, gaps, and crevices, use a screed board to drag off the excess. This usually is a two person operation and is fairly hard work, especially on larger pours. The screed board should extend past the form edges at least 3 inches on either side. Beginning on one end of the form, place the screed board over the form boards and then, using a side-to-side motion and at the same time pulling the board, inch it across the form boards to the opposite end. Screeding levels the concrete with the tops of the form boards, pulling excess concrete off. Any low spots will be visible and should be immediately filled and the area re-screeded.

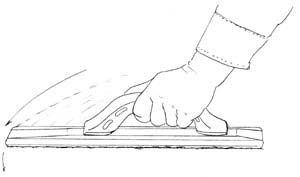
The next step is to float the surface. Small projects can be floated with a wooden or magnesium float. This helps fill any small voids and works the aggregate slightly below the surface. On larger pours a bull float is used. Push the float away from you across the surface with the front edge slightly raised to prevent the blade from digging in. Then pull the float back at an almost flat angle.
Use a wooden or magnesium float to smooth up the concrete and work the aggregate down. A bull float is used on larger pours.

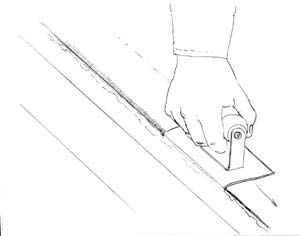
Then use an edger around the top edge of the form. This creates a rounded edge that won’t chip off when the form is removed. The edger should be held fairly flat, but keep the front tilted up slightly when moving forward and the rear tilted up slightly when moving backward.
Use an edger to slightly round the edge of the concrete.
Jointing is the next step on projects such as sidewalks and driveways. This prevents cracking the slabs. Control joints are normally spaced at intervals equal to the width of the pour. It is recommended, however, not to exceed 10 feet in any direction without a joint. The joint should be cut at least one-fourth the depth of the slab. A jointer tool is used for this step. Place a straight-edge across the surface and run the jointer along the straight edge to create a nice straight line. As with the edger, hold the front up slightly when pushing forward. Control joints in large slabs can also be cut after the concrete cures, using a masonry blade in a circular saw or concrete saw.
Expansion joints must be cut in large slabs. A jointer held against a straight edge produces a nice, straight-line groove.

Next, use a float to smooth and level the surface. This will also help remove any marks left by the edger or jointer. For rough or textured surfaces, use a wooden float. For projects requiring a smoother finish, use a magnesium or aluminum float. Hold the float flat on the surface and move it in an arc, overlapping the arcs as you proceed. Don’t overwork the surface.
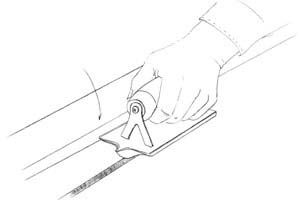
The final finishing step is troweling. Small projects can be hand-troweled. The first troweling should be done with the blade held flat down on the surface. Again use the trowel in an arc, overlapping each previous arc by about 1/2 inch. The surface should be well troweled several times to produce a hard, durable surface. Allow the concrete to set up slightly for the additional trowelings. The proper time is when the sheen of water disappears and a footprint leaves less than 1/2 inch of an indentation. These trowelings should be done fairly vigorously and with the trowel tilted up slightly, pressing down on the “rear” edge.
The final step is to smooth the surface using a trowel.
Best Price Guarantee
Get the best price for your concrete project today, it's guaranteed!
- Ready Mixed Concrete
- Commercial Projects
- Residential Projects
- Service First

